
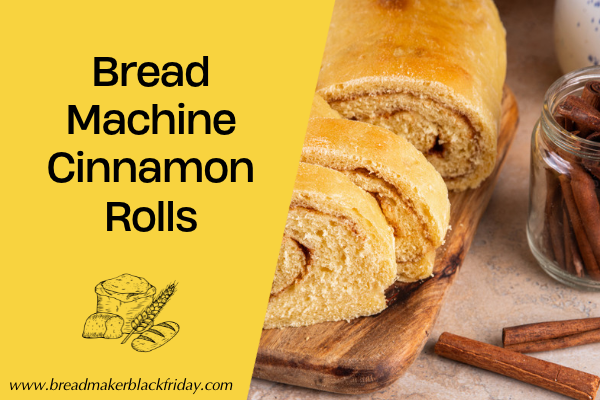
Nothing beats the aroma of freshly baked cinnamon rolls wafting through the kitchen on a lazy weekend morning. However, making them from scratch usually involves a lot of messy kneading, guesswork with yeast temperatures, and hours of waiting.
That is where your trusty bread maker comes in. By letting your bread machine handle the mixing, kneading, and first rise on the Dough Cycle, you get bakery-quality, pillowy-soft cinnamon rolls with a fraction of the effort. Whether you are testing out a new appliance from Bread Maker Black Friday or looking for a foolproof holiday breakfast, this recipe is guaranteed to become a household favorite.
Why Use a Bread Machine for Cinnamon Rolls?
- Consistent Kneading: Bread makers develop gluten evenly without overworking the dough, resulting in a tender, pull-apart texture.
- Ideal Proofing Environment: The machine maintains a warm, draft-free environment for the yeast to thrive, taking the stress out of cold winter mornings.
- Less Cleanup: All wet and dry ingredients go straight into one pan—no flour-dusted countertops or heavy stand-mixer bowls to wash.
(Still shopping around for the right machine for your kitchen? Check out our latest deals and top-rated models over at breadmakerblackfriday.com before you start baking!)
Ingredients You’ll Need
For the Sweet Yeast Dough
- 3/4 cup whole milk, lukewarm (about 100°F–110°F)
- 1/4 cup unsalted butter, softened and cut into pieces
- 1 large egg, room temperature
- 3 cups bread flour (all-purpose flour works too, though bread flour gives a better chew)
- 1/4 cup granulated white sugar
- 1 teaspoon salt
- 2 teaspoons instant yeast (or bread machine yeast)
For the Gooey Cinnamon Filling
- 1/3 cup unsalted butter, very soft (spreadable, not melted)
- 3/4 cup dark brown sugar, packed
- 2 tablespoons ground cinnamon
For the Cream Cheese Frosting
- 4 oz cream cheese, softened to room temperature
- 1/4 cup unsalted butter, softened
- 1 cup powdered sugar (confectioners’ sugar)
- 1 teaspoon pure vanilla extract
- 1 to 2 tablespoons milk or heavy cream (to adjust consistency)
Step-by-Step Instructions
Step 1: Load the Bread Machine
Add the ingredients to your bread machine pan in the exact order recommended by your manufacturer (typically liquids first, dry ingredients second, and yeast last):
- Pour in the lukewarm milk, softened butter, and beaten egg.
- Add the bread flour, granulated sugar, and salt.
- Make a small indentation in the top of the flour (away from the salt) and pour in the yeast.
Step 2: Run the Dough Cycle
Place the pan into your bread maker, close the lid, and select the Dough Cycle (usually about 1 hour and 30 minutes). Once the cycle finishes and the machine beeps, your dough should be smooth, elastic, and doubled in size.
Step 3: Roll and Fill the Dough
- Lightly flour your work surface and turn the dough out of the pan. Gently punch it down to release air bubbles.
- Roll the dough into a neat 12×18-inch rectangle, about 1/4-inch thick.
- Spread the softened butter evenly over the entire surface, leaving a 1/2-inch border along one of the long edges.
- In a small bowl, mix the dark brown sugar and cinnamon, then sprinkle the mixture evenly over the buttered dough. Gently press the sugar into the butter with your hands so it stays put while rolling.
Step 4: Slice and Second Rise
- Starting from the long edge opposite your bare border, tightly roll the dough into a log. Pinch the seam gently to seal it.
- Use unflavored dental floss or a sharp serrated knife to slice the log into 12 even rolls (about 1.5 inches thick each).
- Place the rolls in a greased 9×13-inch baking dish. Cover tightly with plastic wrap or a clean kitchen towel and let them rise in a warm spot for 30 to 45 minutes, until puffy and touching each other.
Step 5: Bake to Golden Perfection
Preheat your oven to 350°F (175°C). Uncover the rolls and bake for 18 to 22 minutes, until the tops are lightly golden brown and the centers are cooked through (an instant-read thermometer inserted into the center roll should read about 190°F). Avoid overbaking so they stay soft and gooey!
Step 6: Frost While Warm
While the rolls bake, beat the cream cheese and butter together until smooth. Mix in the powdered sugar, vanilla extract, and 1 tablespoon of milk until creamy. Spread generously over the cinnamon rolls while they are still warm so the frosting melts into every swirl.
Pro Tips for Bakery-Style Results
- The Heavy Cream Trick: For extra-gooey, Cinnabon-style rolls, pour 1/3 cup of warm heavy cream over the risen rolls right before putting them in the oven. The dough absorbs the cream as it bakes, creating an ultra-rich center.
- Use Dental Floss for Clean Cuts: Squishing the log with a dull knife ruins the swirl. Slide a piece of unflavored dental floss underneath the log, cross the ends over the top, and pull straight through for crisp, round spirals.
- Make-Ahead Overnight Option: After slicing and placing the rolls in the baking pan (Step 4), cover tightly and refrigerate overnight instead of letting them rise on the counter. The next morning, take them out of the fridge 45–60 minutes before baking to come to room temperature and finish rising.
Frequently Asked Questions
Can I bake the cinnamon rolls directly inside the bread machine? While you can bake a cinnamon swirl loaf in the bread maker, traditional spiraled cinnamon rolls require a flat baking dish so each roll can expand evenly and caramelize on the bottom. Using the bread maker strictly for the Dough Cycle gives you the best of both worlds.
What if my dough looks too wet or too dry during kneading? Check your dough about 5 to 10 minutes into the kneading phase. It should form a smooth, tacky ball that cleans the sides of the pan. If it’s crumbly, add warm milk 1 teaspoon at a time. If it’s sticking to the walls like batter, add bread flour 1 tablespoon at a time.
Loved this recipe? Explore more bread machine guides, baking tips, and seasonal discounts at Bread Maker Black Friday.

Laura Lee is the head chef of the acclaimed Asiabay Restaurants and a globally respected culinary blogger. Combining her fine-dining background with a passion for effortless home cooking, she shares simple, foolproof Asian and European recipes—alongside expert guidance on baking and kitchen appliances—to help home cooks create delicious meals with ease.